Pulling the carpet off a staircase is the one flooring project where nobody — homeowner or contractor — can quote it honestly until the carpet comes up. Three different staircases hide under three different carpets, and they lead to three completely different jobs.
Updated September 10, 2026·16 min read·By Angel Hardwood Floor Corp
The short answer
A carpeted staircase is hiding one of three things, and which one decides everything that follows. Finish-grade solid treads — usually oak — can be sanded and refinished, and that is the best outcome there is. Builder-grade pine or poplar treads, made to be carpeted and never meant to be seen, take a retro-fit tread cap or full replacement. Plywood or OSB treads are structure, not surface, and always need new wood on top of them.
Nobody can tell which one you have from the top of the stairs. It takes five minutes and one lifted corner of carpet, and any quote given without that is a guess — usually an optimistic one.
Carpeted stairs are the last carpet standing in a lot of western-suburb houses. The living room went to hardwood years ago, the hallway followed, the family room after that, and the staircase in the middle of it all is still wearing the beige it came with. It is the most-looked-at surface in the house and the one people put off longest, because unlike a room, you cannot close it off while somebody works on it.
When homeowners in Naperville finally call about it, the question is almost always some version of “how much to take the carpet off the stairs and make them match the floors?” The honest answer starts with a question back: what is under there? Because a staircase built to be carpeted is a completely different object from a staircase that was carpeted later, and the two jobs have almost nothing in common except the word “stairs.”
This guide covers how to find out which one you have before anyone quotes you, the three ways the work actually gets done, the details that get left out of cheap quotes, and the geometry problem that catches people who go the shortcut route. If you are also planning to refinish the floors, do read our refinishing cost guide alongside this one — the two jobs are much cheaper and much better together than apart, for reasons that come up several times below.
Every carpeted staircase in this market falls into one of three categories. Hold these in your head and the rest of the guide follows from them.
Finish-grade solid treads. Real oak, maple or another hardwood, milled with a proper nosing, sanded and finished at some point in the staircase's life. These were meant to be seen. A carpet or a runner went over them later, often when a family with small children moved in. This is the jackpot: the wood is already there, already the right species, and just needs the staples pulled, the surface sanded and a new finish put on.
Builder-grade softwood treads. Pine, poplar or fir, usually with a factory bullnose, knotty and never finished on top. These are structurally sound treads that were manufactured to live under carpet forever. They cannot be sanded into a hardwood staircase — the wood is too soft to hold up to foot traffic, it dents under a heel, it takes stain blotchily, and it is full of knots and mill marks. What it can do is act as a solid base for something else.
Plywood or OSB treads. Sheet goods cut to width and screwed to the stringers, with no nosing at all and often a gap at the front where the carpet wrapped. This is pure structure. There is nothing here to refinish and there never was.
The second and third categories are overwhelmingly what you find in the subdivisions built across Plainfield, Oswego, Bolingbrook and south Naperville from the late 1980s onward. The first category turns up far more often in the older housing stock — Wheaton, Downers Grove, Geneva, St. Charles — and in the pre-1980 parts of Naperville, where a staircase was finished woodwork before anyone thought to cover it.
The single most useful thing you can do before calling anybody is look under the carpet. It costs nothing, it takes five minutes, and it changes the conversation from a range that spans a factor of four into an actual scope. A contractor who quotes a stair conversion over the phone without knowing which of the three you have is quoting the cheapest one and will find the other two after the deposit.
How to find out without ripping it all up
You do not have to demolish anything to answer the question. Stair carpet is almost always stapled rather than glued, and it is easiest to lift at the edges.
The top step or the landing corner. Work a corner up where the carpet meets the upper floor or the wall. A putty knife under the edge is usually enough. You are looking for the top surface of the tread and, more importantly, the front edge.
The nosing is the tell. A finish-grade tread has a rounded, milled nosing that projects past the riser below it and looks like furniture. A builder-grade tread has a nosing too, but the wood behind it is pale, soft and knotty. A plywood tread has a square edge, sometimes with a separate strip of wood tacked to the front to give the carpet something to wrap.
An open side is a free look. If your staircase is open on one side to a foyer, the outer edge of the treads is often visible below the balusters and was frequently finished even when the middle was carpeted. That exposed edge tells you the species and, sometimes, that you have real oak under there.
Look at the skirt board. The wide board running up the wall alongside the treads is usually the same era and grade as the staircase. If it is a painted piece of finger-jointed pine, that staircase was built to be carpeted.
Colour is not species. Pale wood is not automatically pine and orange wood is not automatically oak. Grain is the reliable signal: oak has long open pores and a coarse, striped figure; pine has tight lines and round dark knots.
If you get a corner up and cannot tell, photograph the front edge of a tread from the side and hold onto it. That single picture answers most of what an estimate needs to know before anyone walks in.
Staples, tack strips and what they leave behind
Carpet on stairs is held down with a surprising amount of metal, and it does not come out clean.
A typical flight has hundreds of staples — along the back of each tread, up both sides, and around the nosing. Every one has to come out individually, by hand, with pliers. Pulling them is slow, unglamorous work and it is a real line item on any honest quote, not something that happens for free while the sander warms up. Staples driven flush have to be dug out; staples that snapped off below the surface have to be punched deeper so they do not tear a sanding belt or, worse, leave a black iron stain when the finish goes on.
Then there are the tack strips: thin wood strips full of angled nails, run along the back of each tread and up the sides. They are nailed down hard and they frequently split the wood underneath when they come up. On a finish-grade oak tread, the resulting nail holes fill and sand out invisibly. On a soft pine tread, the fill shows, because filler and softwood do not take stain at the same rate.
The practical consequence is that the same carpet removal produces two different results depending on what is underneath — and it explains why the refinishing route only makes sense on category one. It is the same principle that governs a floor repair: what you can hide depends on what the material lets you hide, which our floor repair guide works through in more depth.
The three ways this job gets done
Whatever is under the carpet, the finished staircase is arrived at one of three ways.
Refinish what is there. Pull the carpet and metal, sand the treads, handle the risers separately, stain and finish. Only possible on finish-grade solid treads in sound condition.
Cap it. Leave the existing treads in place as a base, cut off the old nosing, and install a retro-fit tread — a purpose-made hardwood cap, typically three-eighths to half an inch thick with its own nosing — glued and fastened over the top. New riser boards go over the old risers the same way.
Replace. Take the treads and risers off the stringers entirely and install new solid hardwood treads and risers, scribed to the skirt boards.
Those are not tiers of quality in a simple sense. A properly installed cap over a solid, level base is a good staircase; a full replacement on a staircase whose stringers are out of true is not automatically better. The right choice is dictated by what is underneath, by how much floor height you can afford to give up, and by whether the stairs are open on one side.
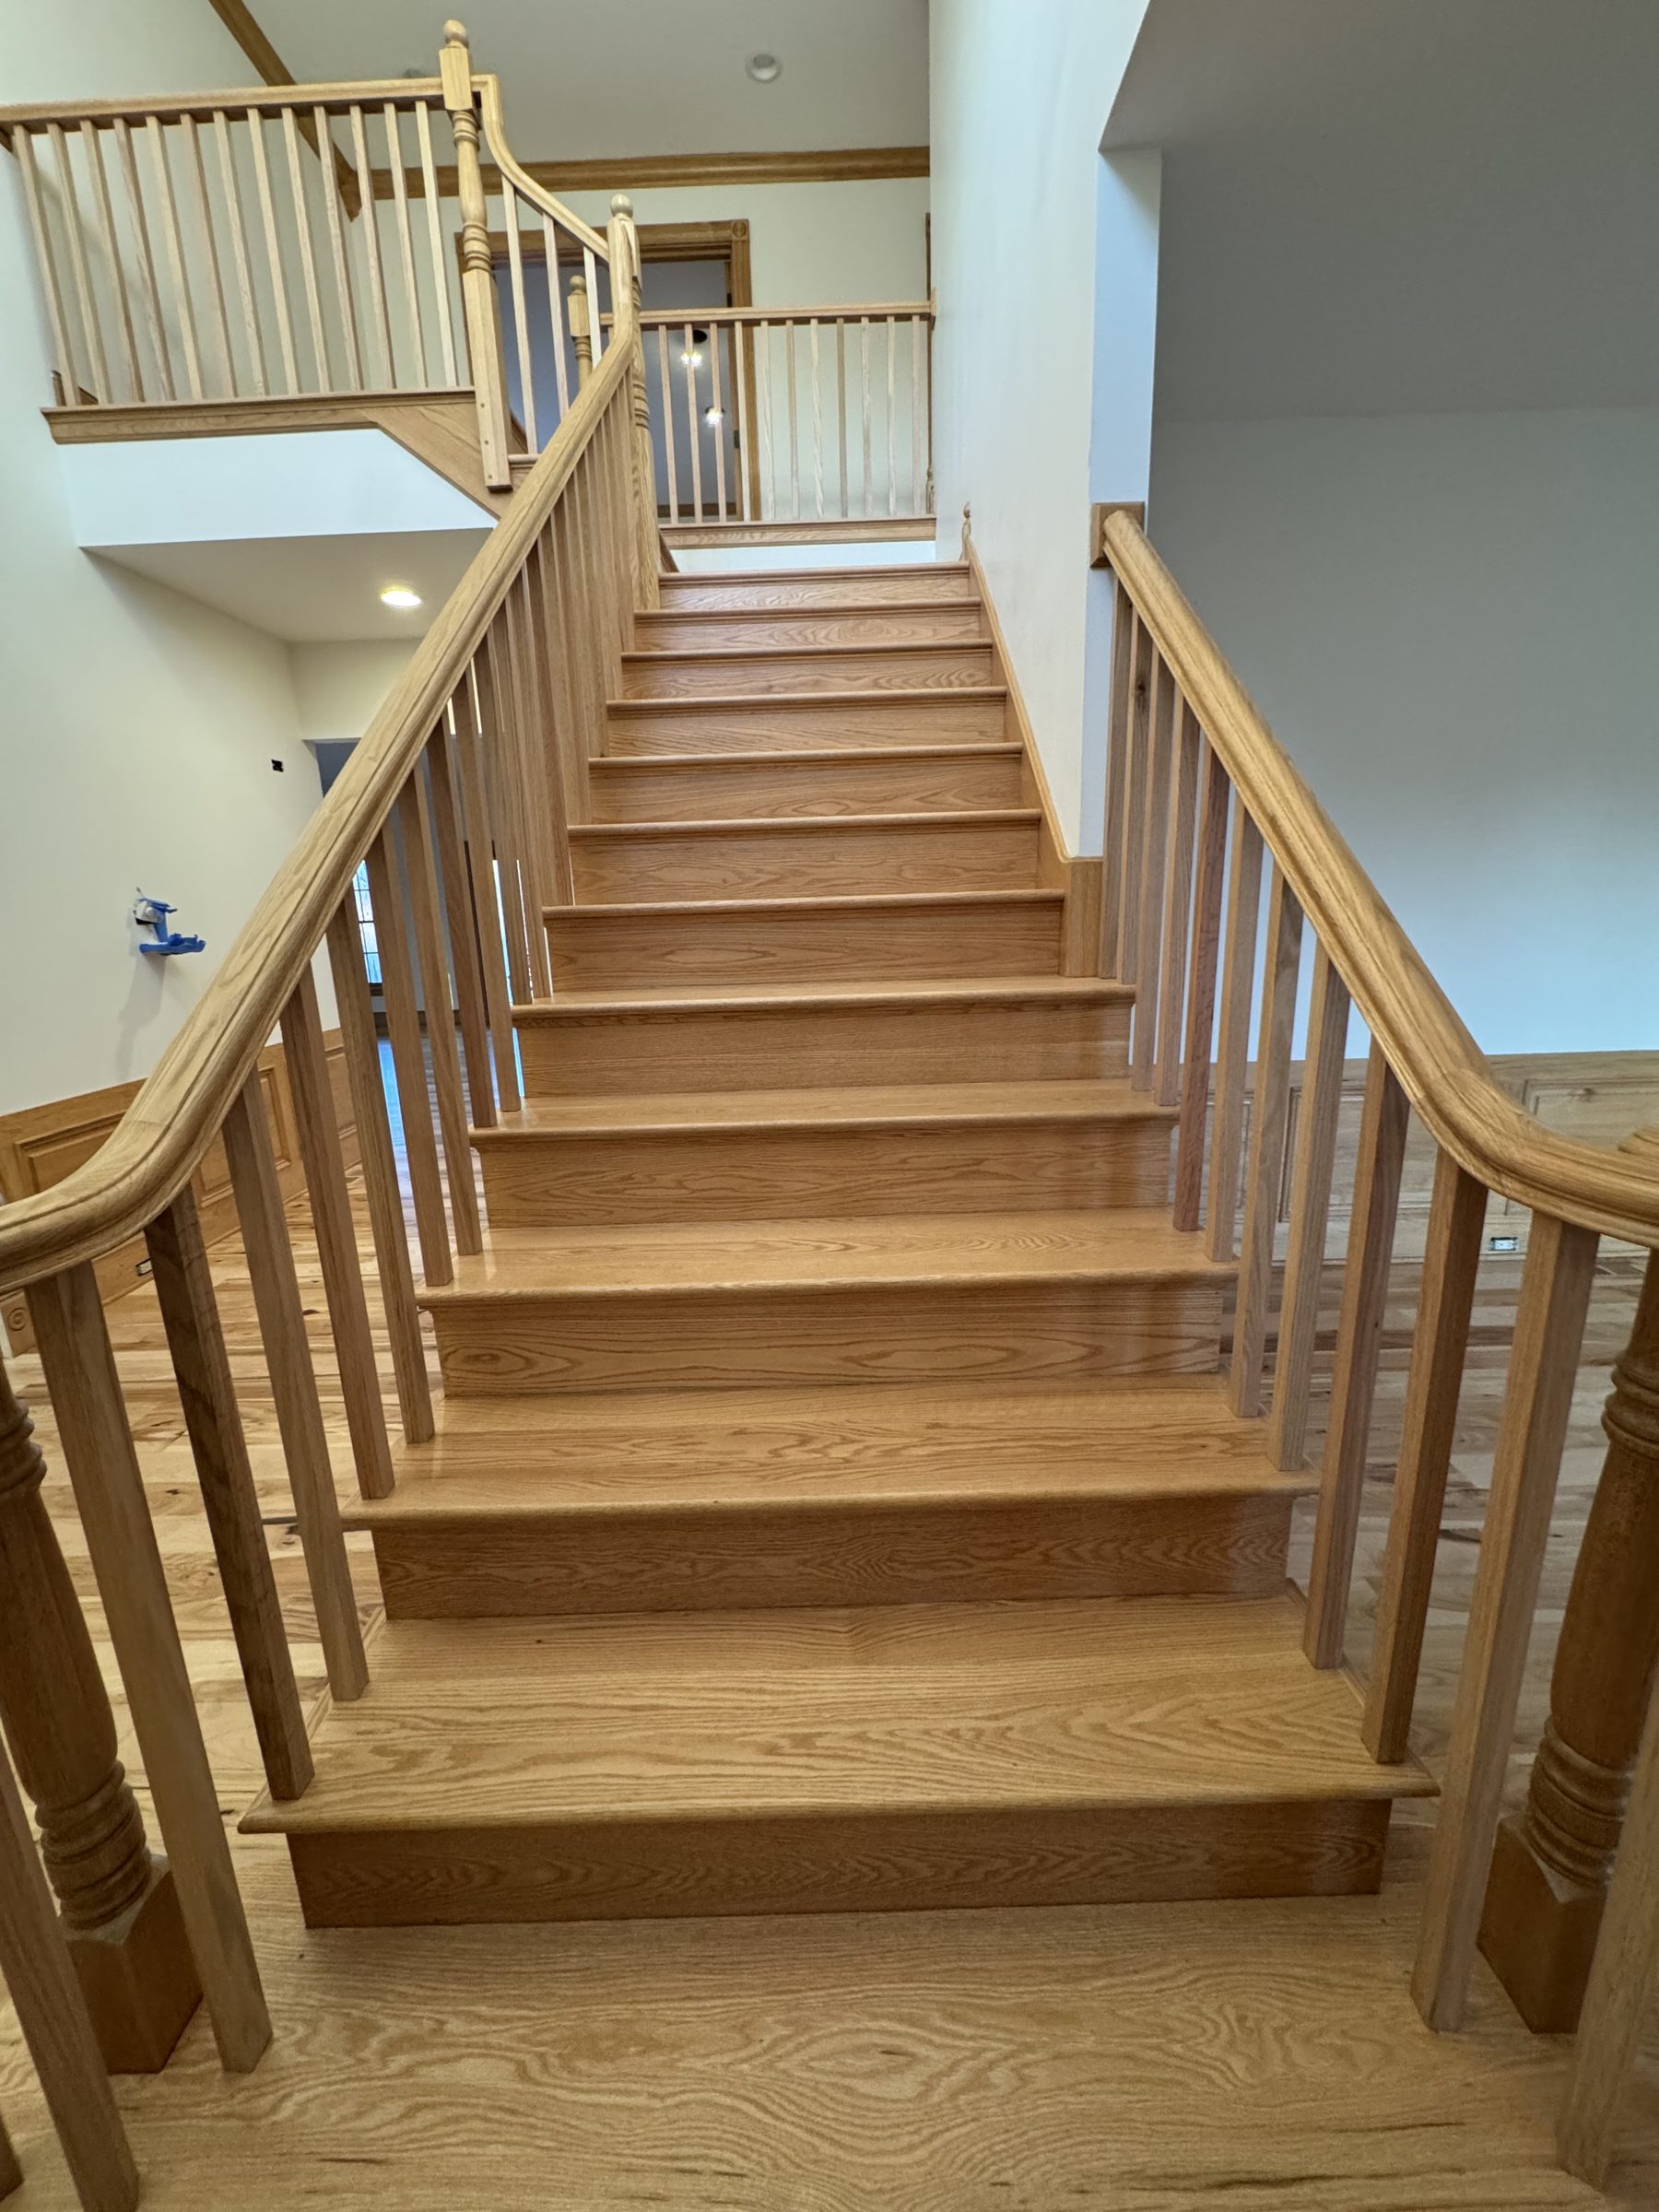
Treads, risers, skirt, railing, balusters and newels all reading as one piece of woodwork. That consistency is the whole point of a stair project, and it is the part that gets lost when treads are done in isolation — more examples in our project gallery.
Refinishing treads that are already there
When the wood is real, this is the best value in the trade. You are not buying material; you are buying labour and finish, and you end up with the original staircase looking the way it was built to look. It is the same process as a floor restoration, carried out on a surface that has to be worked almost entirely by hand.
It is not fast. A staircase cannot be run with the large machines that make an open floor efficient — there is nowhere to push them. Every tread is sanded with a small orbital or by hand, every riser separately, and everything around a baluster is hand work with the sander held at an angle or with a scraper. A flight of stairs typically takes a comparable amount of time to a good-sized room, for a fraction of the square footage. That ratio surprises people and it is the honest reason stairs cost what they do.
Two things routinely turn up once the carpet is off. The first is wear on the nosings — the front edge of each tread carries the traffic and is often rounded, split or worn thin, particularly on the middle steps. Nosings can be repaired, but on a staircase where several are gone, a cap or replacement starts to make more sense than sanding. The second is squeaks, which the carpet was muffling. A squeak is movement between the tread and the stringer or riser, and the moment before new finish goes on is by far the cheapest time in the life of the staircase to fix it, because the fasteners can be set and filled while the wood is still bare.
Retro-fit tread caps: the overlay route
This is the most common route in subdivision houses, and there is nothing second-rate about it when it is done properly. The existing pine or plywood tread stays where it is and does the structural work. Its nosing is cut off flush with the riser. A new hardwood tread — a real solid board with its own nosing, prefinished or unfinished — is glued and fastened over the top, and a thin riser board covers the old riser.
The advantages are real. No demolition, no exposed stringers, the staircase stays usable for more of the process, and you do not risk discovering that the original treads were carrying the flight in ways nobody wants to disturb. Done with good adhesive coverage and proper fastening, a cap does not move, does not squeak and lasts as long as a solid tread.
There are three ways it goes wrong, and they are all avoidable.
A cap follows its base. If the existing tread is cupped, sloped or has a hump where a tack strip sat, the cap telegraphs it. The base has to be flattened first — scraped, sanded or shimmed — and that prep is where a cheap quote quietly saves money.
Adhesive coverage decides the squeak. A bead of glue around the perimeter and nothing in the middle produces a tread that drums underfoot within a year. Full coverage plus mechanical fastening is the standard.
The heights change. This is the one that has consequences beyond appearance, and it deserves its own section.
The height problem a cap creates
Add half an inch of wood to the top of every tread and something has to give at each end of the flight.
In the middle of the staircase, nothing changes: the top of one capped tread and the top of the next capped tread both moved up by the same amount, so the riser between them is exactly as tall as it was. The problem is at the two ends. The bottom riser runs from your finished floor to the first tread — and the first tread just got half an inch taller, so that riser is now taller than every other riser in the flight. The top riser runs from the last tread to the upper-floor surface, and since the last tread rose while the floor above did not, that riser just got shorter by the same amount.
You now have a flight where the first step up is bigger than the rest and the last step is smaller. That is not a cosmetic complaint. It is precisely the situation that causes trips, because people climb stairs on rhythm and not by looking, and building codes limit how much the risers within a single flight may vary from one another for exactly that reason.
This is a solvable problem, and solving it is part of the job. Depending on the flight, the fix is to cap the floor at the top of the stairs as well so both surfaces rise together, to rebuild the bottom riser, or to run the same flooring material across the upper landing so the transition is continuous. What you should not accept is a quote that ignores it. The City of Naperville adopted the 2024 editions of the International Building Code and International Residential Code by ordinance, effective April 2026, so the applicable dimensional limits are the ones in the current adopted edition — worth confirming with the city's building permits desk if your project involves changing the structure of the staircase rather than only its surface.
Full tread and riser replacement
Sometimes the base is not worth keeping. Treads that are cracked, badly out of level, water damaged at the bottom of a basement flight, or made of OSB with a soft, crumbly face are not a foundation for a cap. In those cases the treads and risers come off and new solid hardwood goes on.
This is the most flexible route and the most disruptive. It lets you change the species, the tread depth within what the stringers allow, the nosing profile, and whether the sides are open or closed. It also means the staircase is genuinely out of service for part of the work, and it exposes whatever the original builder did — shimmed stringers, notches cut too deep, a landing framed a little out of square. None of that is unusual in a house of any age, and all of it is easier to deal with once it is visible.
Replacement is also the honest answer when someone wants a staircase that matches a new floor exactly. New treads and new flooring can come from compatible material and take the same stain on the same day, which is a level of match that a cap over an old base can approach but rarely equals. If you are already pricing a whole-house install, our installation cost guide covers how species and grade choices ripple through the rest of the job.
Risers, skirts and the parts nobody budgets
A stair quote that lists only treads is not a stair quote. The pieces that decide whether a finished staircase looks built or looks covered are all around the treads.
Risers. Painted white risers with stained treads is the classic look and by far the most common request in this market; all-stained risers read more contemporary. Either way, the riser is a separate surface that needs its own prep, and old carpet staples run up the risers too.
Skirt boards. The board running up the wall beside the treads. It is usually painted, usually full of nail holes, and it is what makes the junction between tread and wall look deliberate. Scribing new treads tight to an existing skirt is fussy, careful work; the alternative — a gap filled with caulk — is exactly what people mean when they say a staircase looks cheap.
Return nosings. On a staircase open on one side, the tread's nosing wraps around the exposed end in a mitered return. It is a small detail that is visible from the entire first floor, and a tread cut off square at the open end is the single most obvious sign of a rushed job.
Landings. A landing is a small floor, not a big tread, and it is usually laid in the same flooring material rather than in tread stock. Where a landing turns the flight, the winders or the pie-shaped treads that carry the turn are the hardest pieces on the staircase to cut and the slowest to finish.
The top nosing. Where the staircase meets the upper floor there is a piece — a nosing or a bullnose — that finishes the edge. It has to match both the treads and the floor above, and it is the piece most often forgotten until the day it is needed.
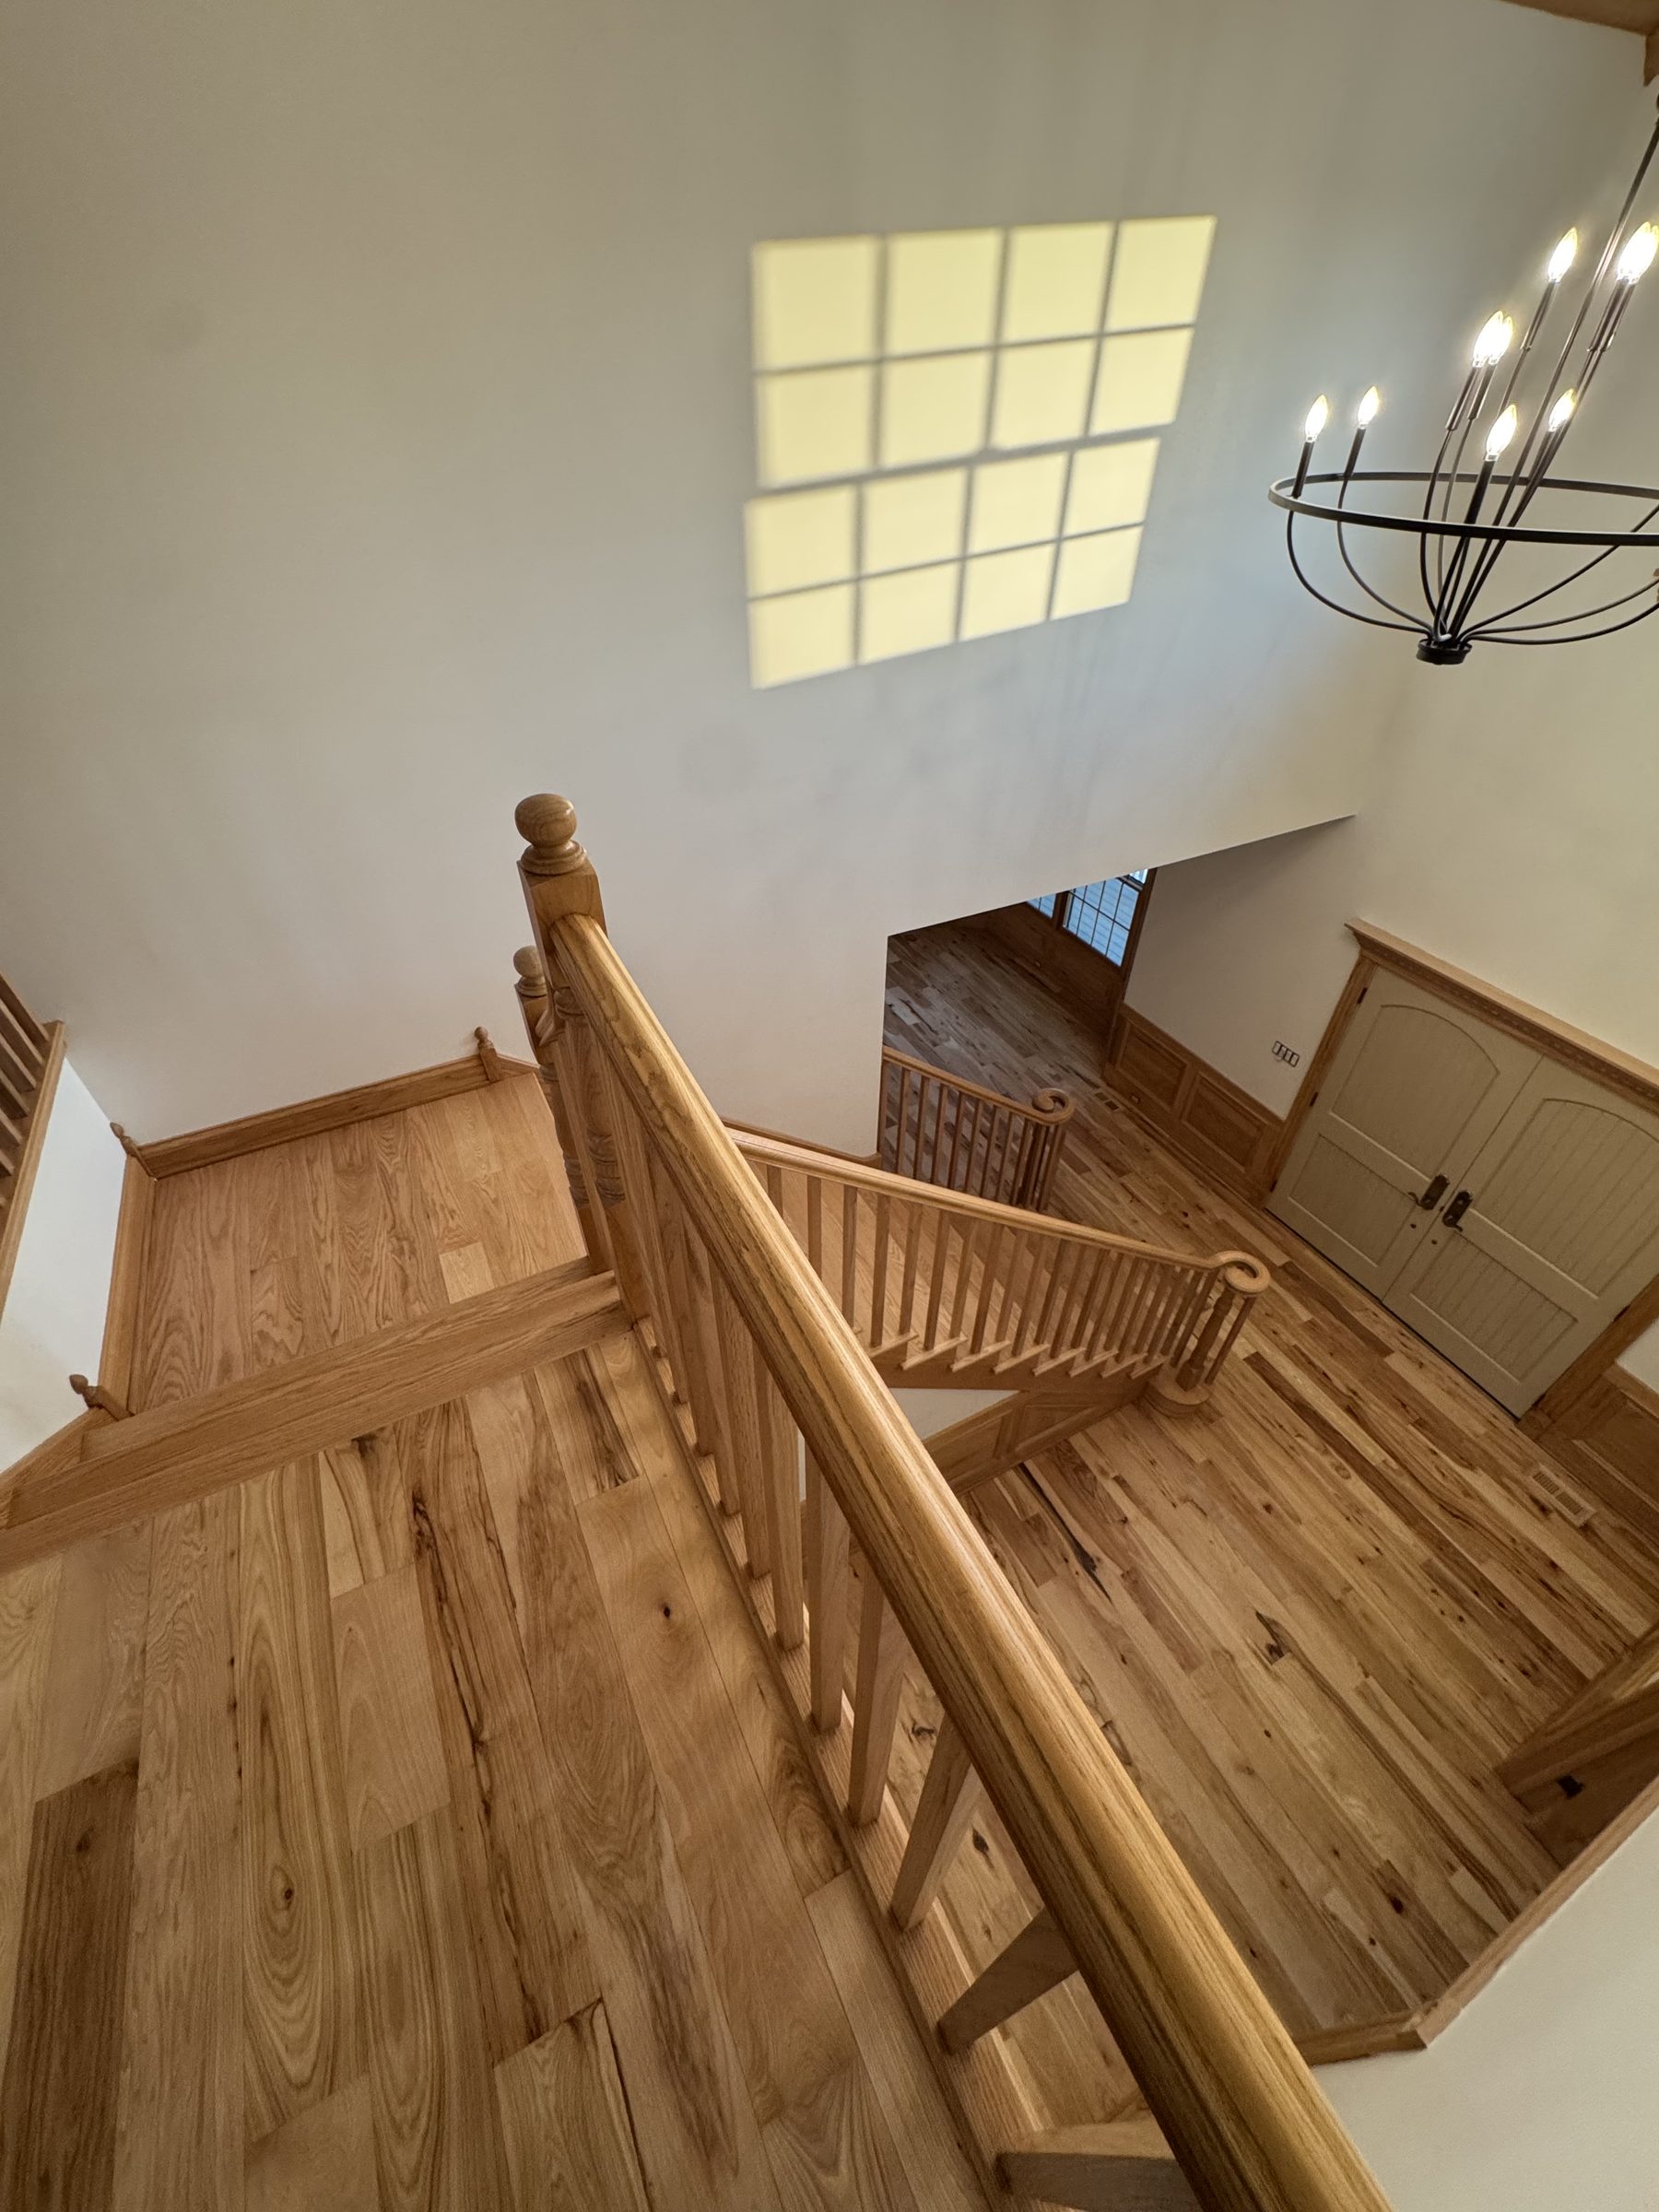
The upper landing is where a stair project meets the floor project. Here the landing runs in the same character-grade hickory as the upstairs floor, with the staircase and railing carrying a different but deliberate tone — a choice, not an accident.
Railings, balusters and the newel post
A refinished staircase under an untouched orange railing looks unfinished, and this catches people who budgeted only for treads. The railing, the balusters and the newel posts are the most visible woodwork in a two-story foyer and they age exactly the way floors do — a decades-old finish on a railing has ambered and worn at every hand position.
Refinishing them is hand work from start to end: stripping or sanding a shaped handrail, getting between balusters, and dealing with the turned details on a newel post. It is slow, and it is worth understanding as a separate line rather than an add-on. Our stair and fixture refinishing page covers what that scope includes.
Two other things worth knowing. Replacing wood balusters with iron is a popular change in this market and it is carpentry rather than flooring — the balusters come out, the holes get plugged and drilled, and the treads underneath usually need attention where the old ones sat. And if balusters or a guard are being altered rather than just refinished, the spacing between them is a code-regulated safety dimension, not a style choice, which is another reason to keep the city's building department in the conversation on anything structural.
Matching stairs to a floor you already have
This is the request behind most stair calls: make the stairs match the floors. It is achievable, and it is harder than it sounds for reasons that have nothing to do with skill.
A stair tread and a strip of flooring are different objects even when both are red oak. A tread is a thick, wide board, often laminated up from several pieces, and it is frequently milled from a different grade and cut of lumber than flooring is. Thick, dense stock takes stain differently from thin strip flooring — usually a shade lighter, because it absorbs less. That difference is invisible in a showroom sample and obvious in a foyer.
Layered on top of that is age. An existing floor has been under UV and under a finish that has been changing colour for years; new tread stock has not started. Stain can be matched, grade can be matched, sheen can be matched — the head start cannot. This is the same wall that repairs run into, and the same solution applies.
If the floors are going to be refinished anyway, do the stairs at the same time. It is the only way to get a true match rather than a close one: the same mixed stain, the same batch of finish, the same conditions, the same day. It also saves a second mobilization. Homeowners who do stairs first and floors eighteen months later almost always end up with two related but visibly different colours, and there is no fixing it afterwards except by doing one of them again. Which finish you choose matters here too — our finishes guide covers how each one ambers and wears over time.
Where the floors are staying as they are, the realistic goal is a deliberate relationship rather than an invisible seam. Matching the stain closely and matching the sheen exactly reads as intentional. So does the opposite approach — a clearly different, darker tread against a lighter floor, which no one mistakes for a failed match.
Slip and noise: the honest case for a runner
Two things get quieter after the carpet comes off, and neither of them is the staircase.
Wood stairs are more slippery than carpet, particularly in socks, and particularly on the way down. That is not a finish defect and no finish eliminates it; a matte sheen looks less glossy but does not meaningfully change how much grip the surface has. For households with young children, anyone unsteady on their feet, or a dog that takes the stairs at speed, this is worth thinking about honestly before the carpet goes in the skip. The answer that actually works is a runner over the finished wood: you get the woodwork, the exposed edges and the look, plus grip and sound control down the middle. It is also, not incidentally, how most of the finish-grade oak staircases in older houses out here ended up carpeted in the first place.
Wood stairs are also louder. In a two-story foyer that opens onto the living space, a flight of bare oak carries footsteps through the whole first floor in a way carpet never did. Some people find that pleasant and some find it a genuine irritation, and it is much easier to consider now than to fix later.
One practical note if you do plan a runner: it goes down after the finish has cured, not after it has dried. Those are different things, and covering a green finish is one of the most common ways a beautiful new staircase gets ruined in its first month.
The three paths, side by side
Nearly every stair conversion resolves into one of these, sometimes two of them in combination on the same flight.
Path
Requires
What you get
Watch out for
Disruption
Refinish existing treadsBest value
Finish-grade solid treads in sound condition
The original staircase, matched to refinished floors
Worn or split nosings; deep staple damage; squeaks the carpet hid
Moderate. Hand sanding, then cure time
Retro-fit tread capsMost common
A flat, sound base tread — softwood or good plywood
A real hardwood surface without demolition
Riser heights at the top and bottom; adhesive coverage; a base that is not flat
Low to moderate. Often done a few steps at a time
Full replacementMost flexible
Sound stringers; willingness to lose the stairs for a stretch
Any species, profile and open-side detail you want
What the original framing turns out to look like
Highest. The flight is genuinely out of service
General routes and how they behave — not a quote, and not a substitute for an in-person look at your staircase.
What actually moves the price
Stair work is priced by the step and by the detail, not by square footage, and the spread between two staircases with the same number of steps can be large. What moves it:
What the carpet was hiding, which is the whole first half of this guide and by far the biggest single factor.
The number of steps, landings and turns. Winders and pie-shaped treads on a turn take several times as long as a straight tread.
Open sides. Every exposed tread end needs a mitered return, and an open-sided flight is meaningfully more work than one closed on both sides.
Whether balusters have to come out for the treads to be replaced or properly sanded.
Painted risers or stained risers, which are two different trades' worth of prep.
Whether the floors are being done at the same time, which spreads mobilization and, more importantly, gets you a true colour match.
What has to happen at the top and bottom risers if a cap changes the geometry.
Species and grade of the new tread stock, on the cap and replacement routes.
Repairs found along the way — split treads, a loose stringer, water damage at the base of a flight coming out of a lower level.
We do not publish per-step prices for this work, for the same reason we label the ranges in our cost guides as market data rather than a quote: the honest number depends on which of the three staircases you own, and that is the one thing a page cannot know about your house.
What the job does to your week
The staircase is the one surface in a house you cannot work around, and planning for that is most of the logistics.
Where a second staircase exists — a back stair or a basement flight to a walkout — the main flight can simply be closed and the work runs straight through. Where it does not, the practical approaches are to work half the width at a time so one side stays walkable, or to work the flight in two halves top and bottom, or to schedule a defined window where the upstairs is off limits and plan accordingly. Any of those is workable. What does not work is discovering the constraint on the morning the crew arrives.
Then there is cure time, which is the part people underestimate. Our own guidance on refinished stairs is to wait at least 24 hours before light foot traffic and to use slip-resistant socks or slippers rather than bare feet during that first week, with a full cure typically taking around 30 days. The stairs are usable long before they are cured — but the runner, the pet gate that clamps to the newel and the boxes stacked on the landing all wait for the cure, not the dry.
Two kinds of staircase out here
Across the towns we cover in DuPage, Will and Kane County — the full list is on our service area page — the calls sort into two recognisable shapes.
The subdivision staircase. Built somewhere between the late 1980s and the 2000s in the newer parts of Naperville and out through Plainfield, Oswego, Romeoville and Aurora. Carpeted from day one, softwood or plywood treads, open on one side to a two-story foyer, oak railing and balusters that were finished because they were always going to be seen. These are cap-or-replace jobs, and because the railing was already finished, the colour conversation starts from what is already on the newel post.
The older staircase. Wheaton, Downers Grove, Lisle, the Fox Valley river towns and pre-1980 Naperville. Solid oak treads, finished when the house was built, carpeted or run with a runner later. Often the outer few inches of each tread were never covered and are still finished, which both tells you what you have and shows you the colour it used to be. These are refinishing jobs, and they are among the most satisfying work in this trade, because what comes back is the staircase the house was built with.
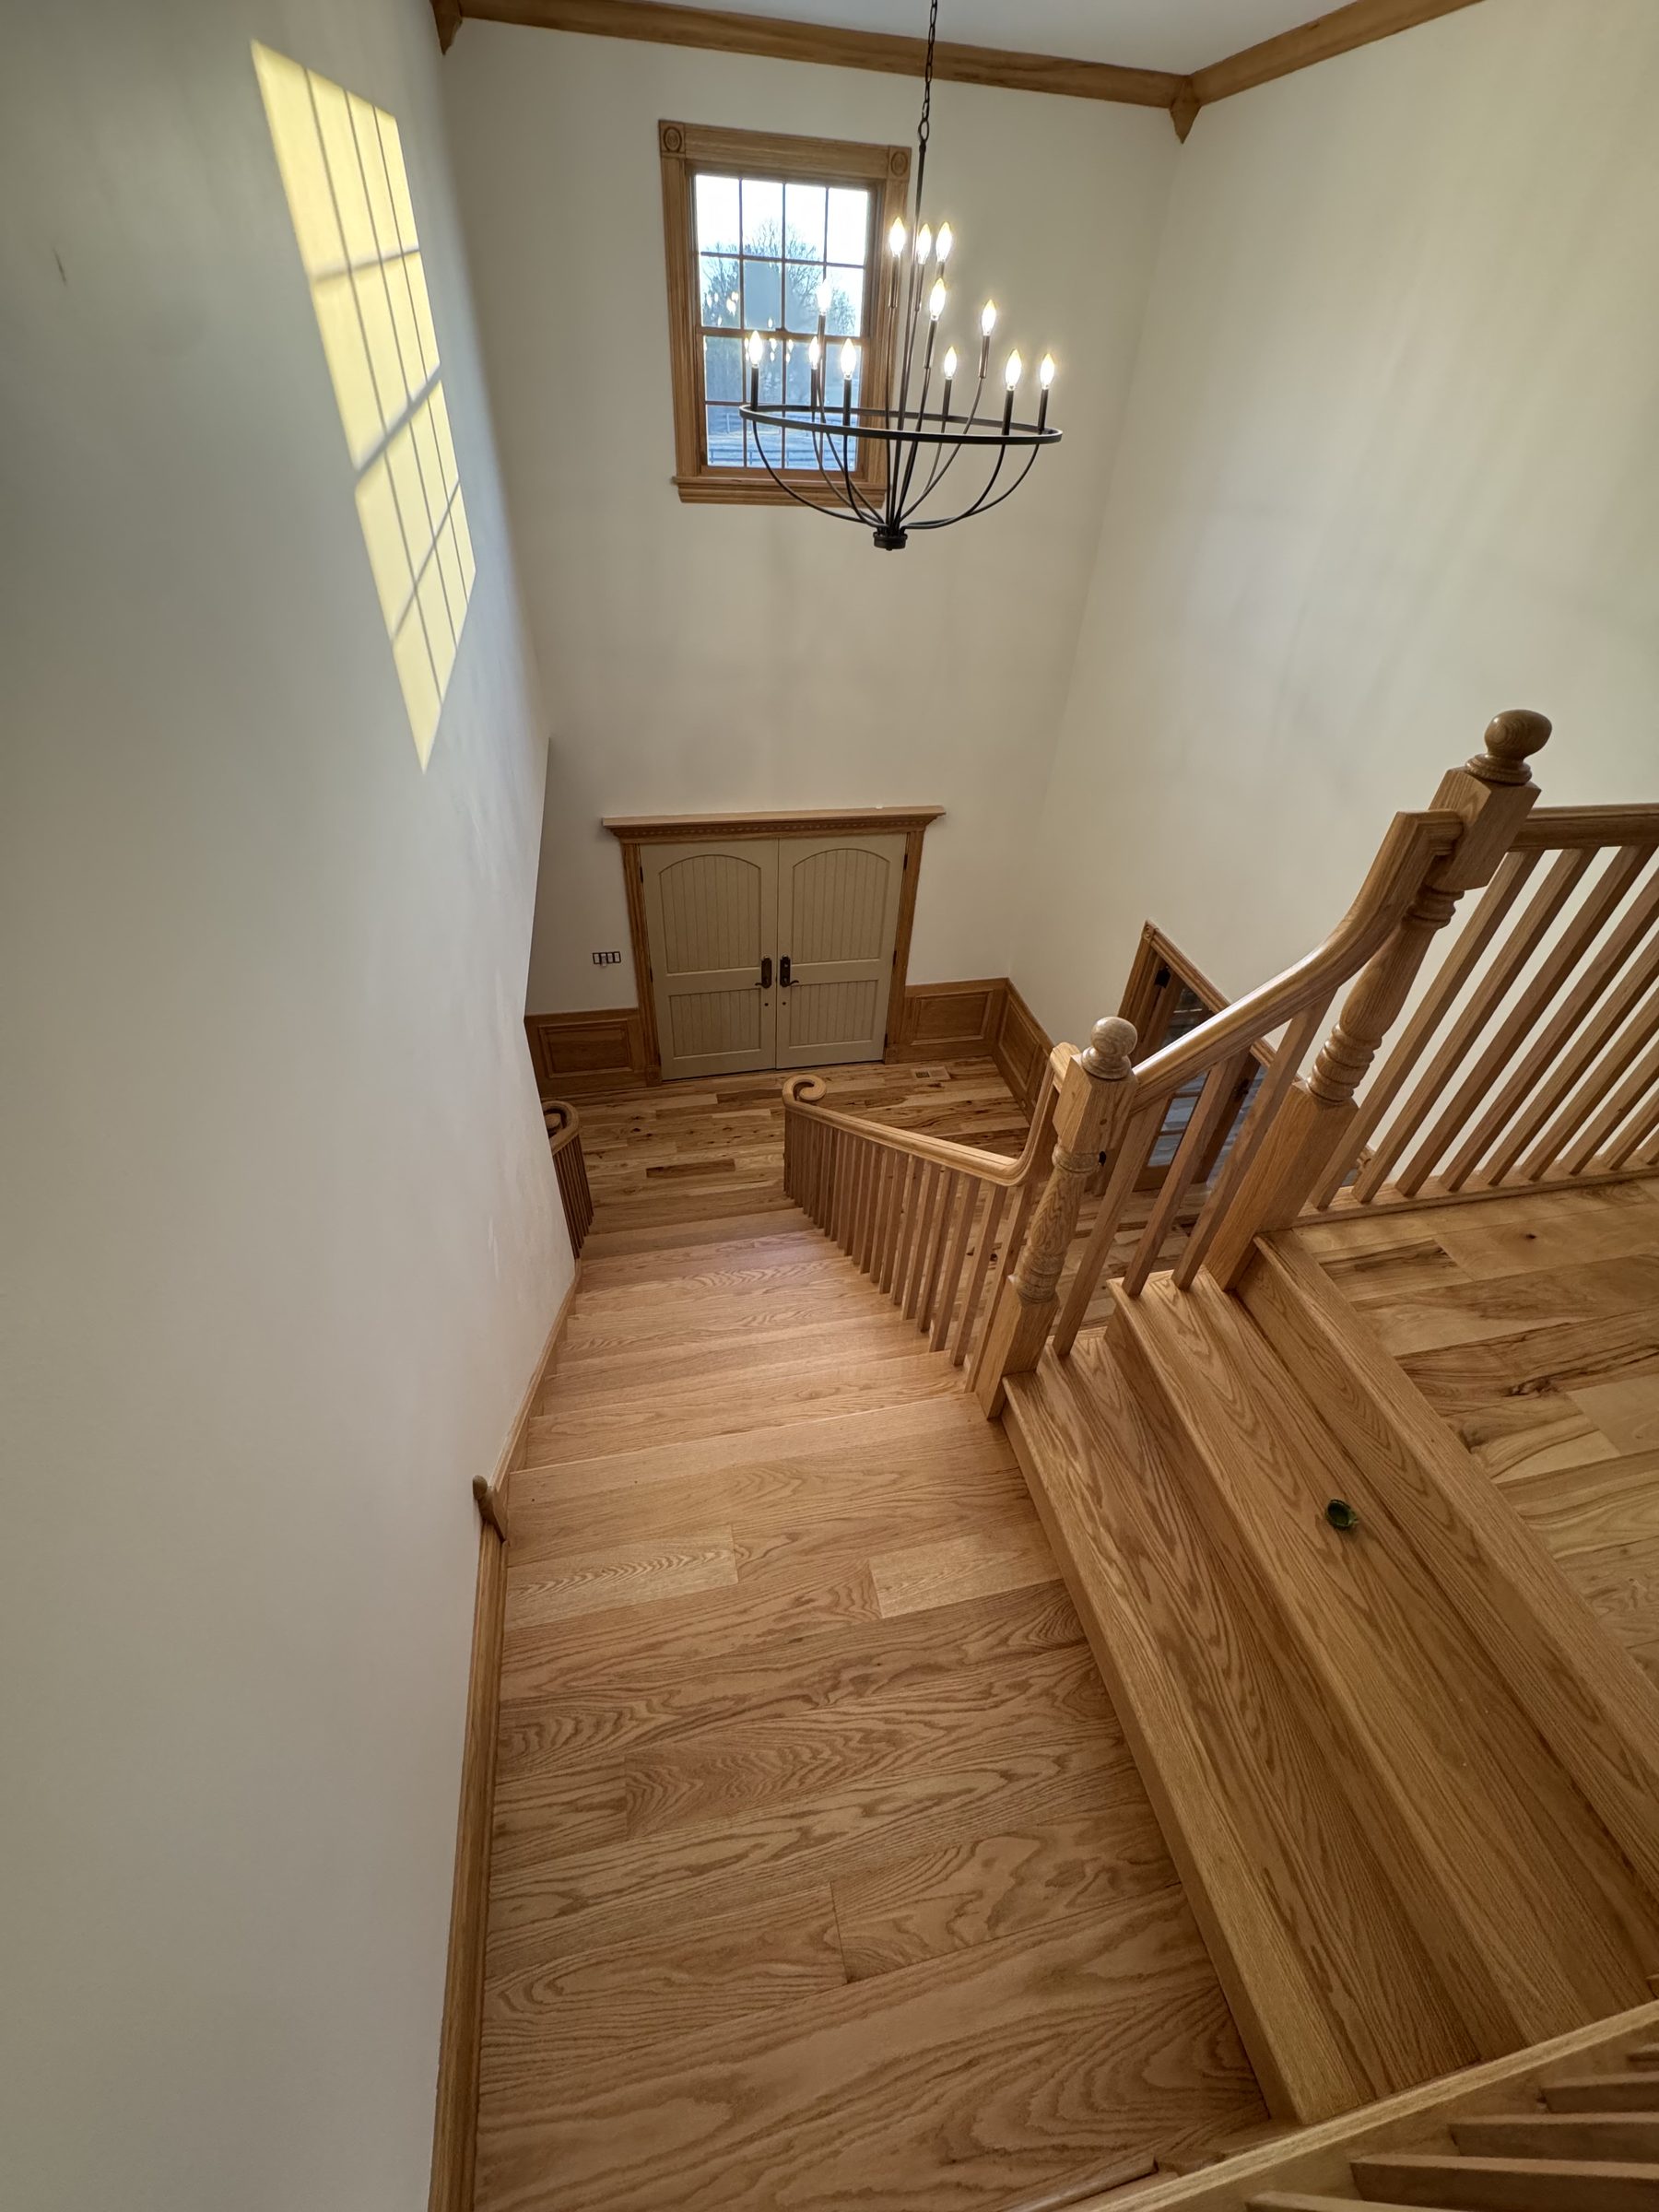
A flight that turns at a landing, with the railing carried through and the floor continuing across. Turns, landings and continuous railings are where the hours go on a stair project — and where the difference between staircases shows up in a quote.
What we check on a stair estimate
A stair estimate is mostly diagnosis, and by the time we leave we want answers to the following.
What the treads actually are — species, grade, and whether they were ever meant to be seen.
Whether they are flat and sound, which decides whether a cap is even an option.
How the nosings have worn, particularly on the middle steps that take the traffic.
What the flight is doing at each end — the bottom riser, the top nosing, and what would happen to both if the treads gained thickness.
Whether the sides are open or closed, and how many returns that means.
The condition of the railing, balusters and newels, and whether they are part of the scope.
What the floors above and below are, and whether they are being refinished in the same project.
Whether there is a second way upstairs, because that changes the schedule more than anything else on this list.
Whether anything is squeaking or moving, and where — while it is still cheap to deal with.
And we will tell you which of the three staircases you own before we tell you a number, because the number does not mean anything until you know that.
Not sure what is under your stair carpet?
We will come out anywhere in DuPage, Will or Kane County, look at what the carpet is hiding, and tell you straight whether your stairs refinish, get capped, or need replacing — and what that means alongside your floors. No obligation either way.
Lift one corner and look at the front edge of a tread. Stair carpet is stapled rather than glued, so a putty knife at the top step, at a landing corner or where the carpet meets the wall will usually free enough of it to see. What you are looking for is the nosing: a finish-grade tread has a rounded, milled front edge and looks like furniture, a builder-grade softwood tread has a nosing but pale knotty wood behind it, and a plywood tread has a square edge with nothing milled at all. If the staircase is open on one side, the outer ends of the treads are often visible under the balusters and were frequently finished even when the middle was covered. Five minutes there tells you more than any phone conversation can.
Not into a hardwood staircase, no. Softwood treads were manufactured to live under carpet: the wood dents under a heel, wears through in the traffic path far faster than oak, takes stain blotchily, and is full of knots and mill marks that a carpet was always going to hide. On top of that, the staple and tack-strip holes fill visibly in softwood because filler and pine do not take stain at the same rate. What pine treads are good for is exactly what they were made for — being a solid, level base. That is why a retro-fit hardwood cap over them is the standard answer rather than a compromise.
Legitimate, and in subdivision houses they are usually the right answer. A cap is a real solid hardwood tread with its own nosing, glued and mechanically fastened over the existing tread after the old nosing is cut off. Installed with full adhesive coverage over a base that has been flattened first, it does not move, does not drum underfoot, and lasts like any other tread. Where caps go wrong is in the prep and in the geometry: a cap follows whatever shape it is glued to, so a cupped or humped base telegraphs straight through, and adding thickness to every tread makes the bottom riser taller and the top riser shorter than the rest of the flight. Both are solvable, and the fix belongs in the quote rather than in a conversation halfway through.
Yes, and we quote standalone stair work regularly. The thing to know before deciding is that doing them together is the only way to get a true colour match rather than a close one — same mixed stain, same batch of finish, same conditions, same day — and it saves a second mobilization. If the floors are staying as they are, the realistic goal is a deliberate relationship instead of an invisible seam: match the stain closely and the sheen exactly so it reads as intentional. What tends to disappoint is doing the stairs now and the floors in a year or two, because the two end up related but visibly different and there is no fixing it afterwards short of redoing one of them.
It depends on the route and on whether you have a second way upstairs. Full tread and riser replacement genuinely takes the flight out of use while it is happening. Refinishing and capping can often be worked half the width at a time, or in two halves top and bottom, so there is always a way up. Where a house has a back stair or a walkout, the simplest plan is to close the main flight and run straight through. After the finish goes on we recommend waiting at least 24 hours before light foot traffic and using slip-resistant socks or slippers rather than bare feet during that first week; a full cure typically takes around 30 days. The stairs are usable well before they are cured, but anything that sits on them — a runner, a pet gate clamped to the newel, boxes on the landing — waits for the cure.
It is a real difference, and it is worth deciding about honestly rather than after the carpet is gone. Wood is more slippery than carpet, particularly in socks and particularly going down, and no finish removes that — a matte sheen looks less glossy but does not meaningfully change how much grip the surface has. For a household with small children, anyone unsteady on their feet, or a dog that takes the stairs at speed, the answer that actually works is a runner over the finished wood. You keep the woodwork and the exposed tread ends, and you get grip and sound control down the middle. Bare stairs are also noticeably louder in a two-story foyer, which surprises people more than the slip does.
Surface work — pulling carpet, sanding treads, refinishing, and in most cases installing tread caps over an existing sound staircase — is generally treated as a finish change rather than a structural alteration. Rebuilding a staircase, altering its framing, or changing a guard or railing is a different matter and can bring code requirements into play, including limits on riser and tread dimensions and on how much the risers within one flight may vary from each other. The City of Naperville adopted the 2024 editions of the International Building Code and International Residential Code by ordinance effective April 2026, so the dimensions that apply are the current adopted ones. We are flooring contractors rather than plan reviewers, so on anything that touches structure the city's building permits desk is the right place to confirm before work starts.
A landing is a small floor rather than a big tread, so it is normally laid in flooring material and finished with the treads. Where a flight turns, the pie-shaped winder treads that carry the turn are the slowest pieces on the staircase to cut and finish, and they are a real factor in what a turned staircase costs against a straight one. The floor at the top matters just as much: there is a nosing or bullnose piece where the staircase meets the upper floor that has to match both the treads and the floor beyond, and it is the piece most often forgotten until the day it is needed. If a tread cap is raising the treads, what happens to that top piece and to the floor beyond it is part of solving the riser-height problem, not a detail to sort out later.