The same can of stain looks different on red oak, white oak, maple and hickory. Choosing a color you will still like in ten years starts with knowing which wood you have, what it does to the pigment, and testing on your own floor in your own light.
Updated September 24, 2026·14 min read·By Angel Hardwood Floor Corp
The short answer
Pick the color for the wood you actually have, not from a chart. Most floors in the western suburbs are red oak, which carries a pink undertone that pushes cool grays toward purple and warms every brown; mid-browns and blended colors are the safe ground. White oak is the more neutral canvas and the one to choose if you want a true gray or a pale Scandinavian look. Maple and hickory resist even staining and usually look best natural or close to it.
Whatever you choose, see it as a sample on your own sanded floor, under the finish that will go on top, in daylight and at night. A two-inch chip under showroom lights is where most stain regret starts.
A stain color change is the single biggest visual decision in a hardwood refinish. It is also the one homeowners most often make from the smallest amount of information: a photo on a phone, a swatch card, a neighbour’s floor seen once at a party. Then the stain goes on across 900 square feet of red oak, and the color on the floor is not the color on the card.
That gap is not a mistake by anybody. A floor stain is a thin, semi-transparent layer of pigment sitting in the top of the wood. What you see is the stain and the wood under it and the finish over it, all at once. Change any one of the three and the color changes. That is why manufacturers photograph the same named stain on different species, and why the rows do not match.
This guide goes through the decision the way it plays out on a real refinish in Naperville and the surrounding suburbs: how each common species takes color, why gray is the trickiest request we hear, when to skip stain altogether, what darker floors show, how samples should be done, and what a color change adds to the price and the week. If you have not yet decided whether to refinish at all, start with our refinishing cost guide and come back.
A finished, stained floor has three layers that each contribute color, and it helps to separate them before looking at a single sample.
The wood. Every species has its own base tone and its own grain structure. Oak has open pores that soak up pigment; maple is dense and closed; hickory swings from cream to dark brown within a single board. The wood is always visible through a floor stain.
The stain. Pigment and dye carried in a solvent, wiped on and then wiped off so it stays in the grain and the surface fibres. It is semi-transparent by design. It can darken and shift the wood’s tone; it cannot make wood lighter than it is bare.
The finish. The clear protective coats on top. Some stay close to clear; others, oil-based polyurethane especially, add an amber tone that deepens with age. Sheen matters too: a matte floor reads softer and slightly lighter than the same color in gloss.
The practical consequence is simple. A color name — “Special Walnut”, “Provincial”, “Classic Gray” — is not a color. It is a recipe that produces a different result on each species and under each finish. DuraSeal’s own stain gallery, for example, shows the same named stains separately on white oak and on red oak, because they do not look alike.
Red oak: the pink you are working with
Most solid hardwood floors in houses out here are red oak, from the post-war ranches and older neighbourhoods through the large 1990s and 2000s subdivisions. Our cost guide calls it the easy case for refinishing, and for staining it mostly is: red oak has a strong, open grain that takes stain evenly and predictably.
What it also has is a pink-to-salmon undertone. Sanded bare, it reads warm; under a clear finish it reads warmer; and whatever pigment you put on it is mixed with that warmth. That shapes the whole palette.
Warm and mid-browns suit red oak well. The pink blends into the brown and the result looks rich rather than rosy.
Neutral mid-browns are the most reliable way to calm the pink without going dark. They are the colors homeowners most often land on once they have seen samples side by side.
Dark browns and near-blacks overwhelm the undertone almost completely, at the cost of what dark floors show (below).
Grays and whites are where red oak fights back. The pink does not disappear under a thin gray pigment; it mixes with it. That is its own section below.
Red oak also has pronounced grain figure, with bold cathedral patterns on flat-sawn boards. Stain settles into the open grain and makes that pattern more visible, not less. If you love the pattern, a mid-tone shows it off. If you find it busy, a darker or more even color quiets it.
White oak: the neutral canvas
White oak is a different tree with a different base tone: more olive, tan and gray than pink. It is the species behind most of the pale, matte, “European” floors in current design photography, and when homeowners bring us a saved picture of a light gray-brown floor, it is very often white oak under a clear or lightly tinted finish.
Because it lacks red oak’s pink, white oak takes cool colors cleanly. A gray stain reads gray. A pale, neutral finish reads neutral. Browns come out a little cooler and less red than the same stain on red oak. It is also the species that makes a natural finish look like the photographs.
The catch is obvious: you cannot turn a red oak floor into a white oak floor with stain. If the look you want depends on white oak’s neutral base, the honest options are to accept a blended color on your red oak that gets close, or to put new white oak in. Our installation cost guide covers what new flooring runs by species in DuPage, Will and Kane County.
Not sure which oak you have? On a floor that has already been finished, it can be hard to tell by eye. Under a sanded sample patch, red oak looks pinkish and white oak more tan or olive. That identification is one of the first things we check on a color-change estimate, because it decides which colors are realistic.
Maple, hickory and the species that resist stain
Maple is dense and close-grained. Instead of soaking into open pores the way it does in oak, stain absorbs unevenly, darker in some areas and lighter in others, and the floor looks blotchy. The darker the color, the more obvious that becomes. Bona’s professional guidance lists maple, along with pine and hickory, among the species that can look blotchy when stained. Maple can be colored with careful preparation, but the most satisfying maple floors are usually natural or very lightly toned, and a dark maple floor should be sampled before anyone commits to it.
Hickory is very hard and very variable. A single board can run from creamy sapwood to deep brown heartwood, and a whole floor has a lot of that contrast. Stain does not even it out; the lighter wood takes color differently from the darker wood, and the variation stays. People who choose hickory mostly choose it for exactly that character, so a natural or light finish is the usual answer. The hickory projects in our project gallery are a good picture of what that looks like at full-room scale.
Exotic and specialty species such as Brazilian cherry change color with light exposure on their own and are generally not stained at all. If you have one of those, the color question is usually about the finish, not a stain.
Why gray goes purple on red oak
Gray floors were a big trend through the late 2010s, and it is still a regular request. On white oak it is straightforward. On red oak it is the single most common source of disappointment in stain selection, and it is worth understanding why before you see a sample.
A gray stain is mostly a thin, cool pigment. Laid over red oak, it does not cover the wood’s pink undertone; it combines with it. The result tends toward a lavender or mauve gray rather than the clean driftwood gray in the photo you were shown, and the effect is strongest in bright daylight. It is not a defect in the product. It is color mixing.
There are three realistic ways to handle it:
Blend. Mixing a gray with a neutral brown cancels much of the pink and produces a gray-brown, sometimes called greige, that reads as intended on red oak. This is the most common route. The ratio is decided by sampling, not by formula.
Move toward brown. Many homeowners who start with gray end up happiest with a cool, neutral mid-brown once they see both on their floor.
Change the species. If a true gray matters, it belongs on white oak.
One more consideration: gray is closely tied to one design era, while a neutral mid-brown or a natural finish is much less so. That is not a reason to refuse gray if you love it, but it is a reason to see it on a large sample before committing a whole main floor to it.
Natural: the case for no stain at all
“Natural” means sanding to bare wood and applying the finish with no stain underneath. It is the baseline refinish, it is the least expensive option, and on a lot of floors it is the best-looking one.
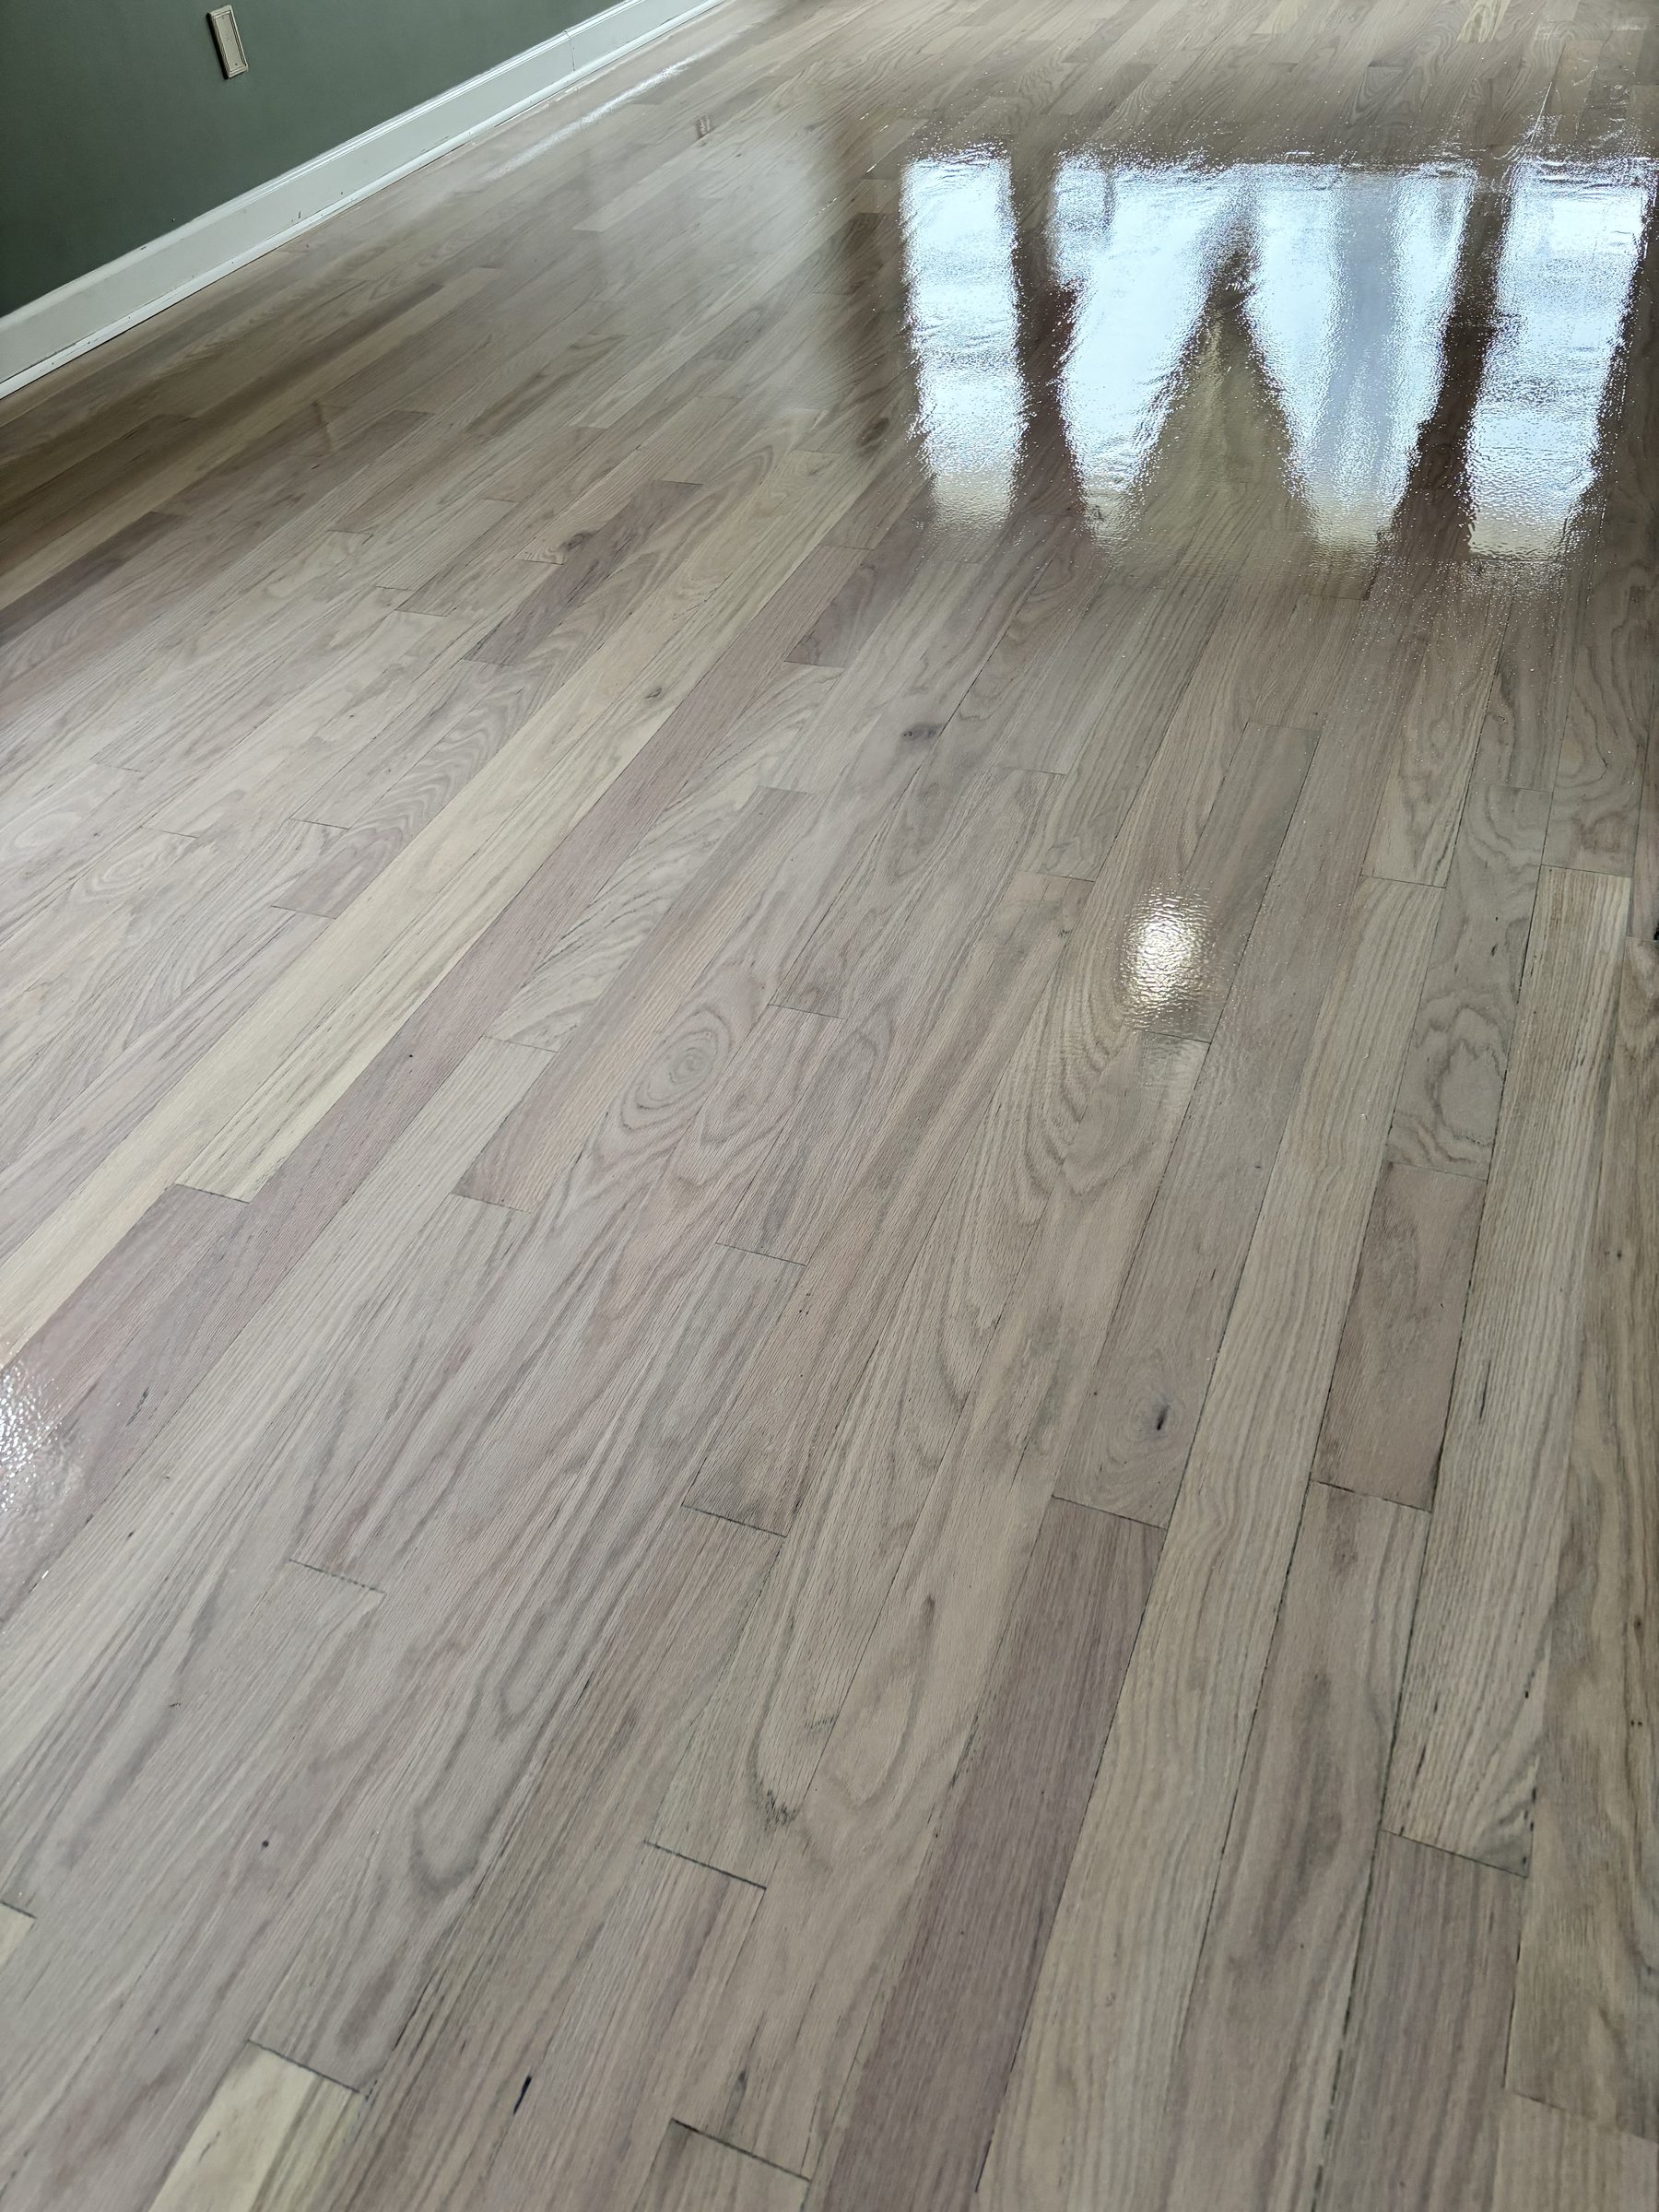
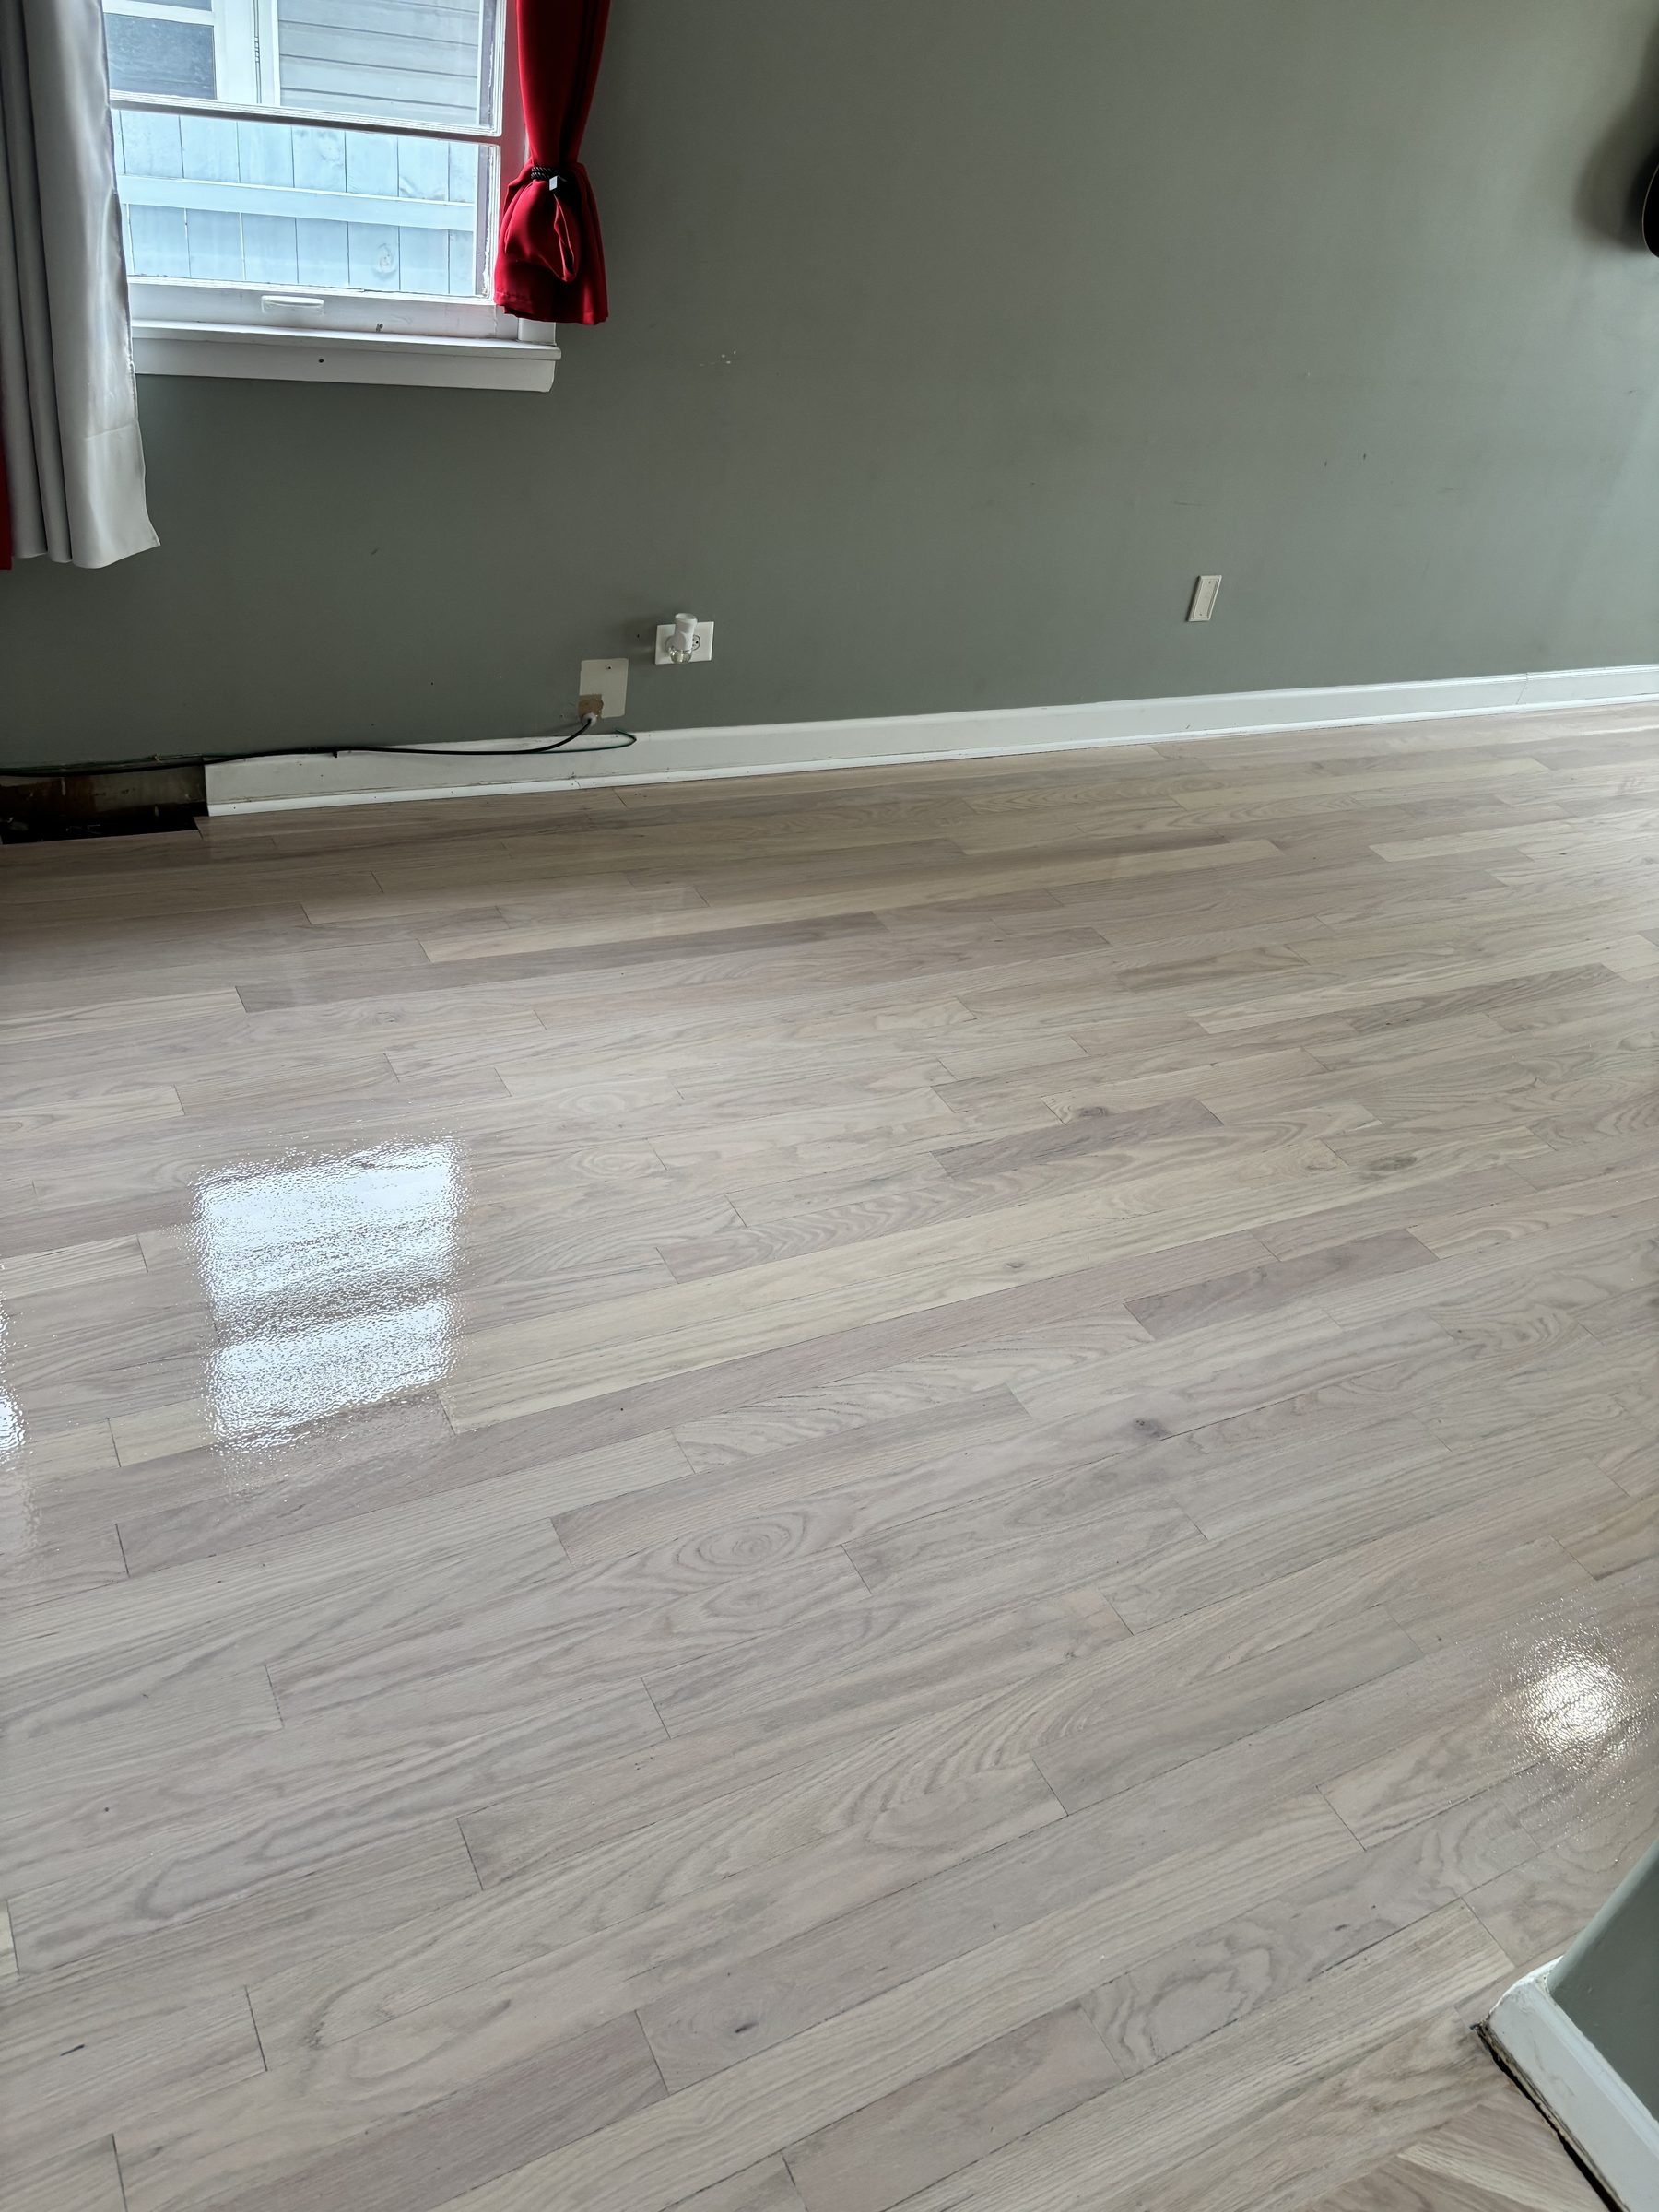
An oak floor sanded to bare wood and finished with no stain. On a clear finish the wood reads pale; the same floor under an oil-based polyurethane would read honey-gold. More of our work is in the project gallery.
What “natural” looks like depends almost entirely on the finish. Under a waterborne polyurethane, which stays close to clear, a freshly sanded oak floor stays pale and light. Under an oil-based polyurethane, which is amber from the day it goes down, the same floor reads honey-gold and keeps warming for years. Our guide to hardwood floor finishes explains that ambering in detail, including why so many red oak floors from the 1990s turned orange with no stain on them at all.
Natural is also the most forgiving choice for the future. Scratches in a natural floor show the same pale wood underneath instead of a light line through a dark color, and spot repairs and board replacements are easier to blend.
Light, mid-brown and dark
Rather than chase color names, it helps to think in three families and decide which one fits the house before sampling.
Light and neutral — natural under a clear finish, pale tints, whitewashes. They make rooms feel larger and brighter, hide dust well, and suit white oak and maple best. On red oak, very pale colors fight the pink, so they are sampled carefully.
Mid-brown — the broad middle, from warm golden browns to cool, neutral browns. This is where most red oak floors end up and where most regrets are avoided. It hides both dust and light scratches reasonably well and suits almost any cabinet, trim and wall color.
Dark — deep walnuts, espresso and near-black. Dramatic and formal, strong contrast with white trim, and the most demanding to live with.
Look at what does not change when you refinish: cabinets, stair railings, trim, fireplace surround, doors. A floor that fights the kitchen cabinets on either side of it is a problem that no sample on its own will reveal. Hold samples next to the fixed finishes in the room.
What a dark floor shows
Dark stains look superb in photographs and in the first week. They are also the least forgiving colors in daily life, and it is worth being clear-eyed about that before committing a main floor to one.
Dust and pet hair sit visibly on a dark surface, especially in low sun across the floor.
Scratches read as pale lines, because the finish scuffs light and anything deeper exposes lighter wood beneath the stained surface.
Footprints and smudges show on dark floors in a way they do not on mid-tones, especially in higher sheens.
Repairs are harder to blend, because a replacement board has to be stained to match a color that has aged under years of light.
A matte sheen helps a great deal on a dark floor, and so does choosing a deep brown rather than a near-black. In a house with a large dog, young children or a busy back door, a mid-tone is usually the better long-term choice, and our vinyl plank vs. hardwood guide covers how different floors cope with dogs and kids.
Water popping: deeper color, longer week
Sanding leaves the wood surface smooth and fairly closed. Water popping means evenly wetting the freshly sanded floor, letting it dry, and then staining. The water raises and opens the grain, so the wood takes more pigment.
According to Bona’s professional guidance on the technique, water popping produces deeper, more saturated and more even color, reduces the contrast between the hard and soft parts of the grain, and helps blend out sanding marks. It is commonly used for darker colors and on species prone to blotching. It is not needed if you want the stain’s standard color, or want more grain contrast rather than less.
It has costs, and a homeowner should know them:
Time. The floor has to dry completely before stain goes on, which Bona suggests means overnight with added air flow, confirmed with a moisture meter. That usually adds a day to the schedule.
A delicate surface. The raised grain is easily marked by feet or equipment before staining, and those marks show up lighter in the final color.
Risk on thin wood. On engineered flooring with a thin wear layer, or solid floors that have been sanded many times, water popping can cup edges and end joints. That is one more reason to know how much wood is left before a color change.
Because water popping changes how dark a given stain turns out, a sample should be done the same way the floor will be done. A popped sample and an unpopped floor will not match.
How to test a stain properly
The color decisions that hold up are the ones made from samples on the actual floor. Here is what makes a sample meaningful:
On your sanded floor, not a board from the store. Your wood, your species, your sanding. A sample on a different piece of oak is a different color.
Prepared the way the whole floor will be. Same sanding sequence, and water-popped if the floor will be popped.
Under the finish that will go on top. A sample of stain alone looks different from stain under polyurethane. At minimum, wet the sample with the finish or view it as it will look once coated.
Big enough to read. A patch a few boards wide shows grain and variation that a small square hides.
Seen in daylight and at night. Morning sun, north light and warm evening bulbs all shift the color. Walk past the samples at different times of day before choosing.
In more than one room if the floor runs through several. A south-facing living room and a north-facing hallway can make one color look like two.
Next to what stays. Hold cabinet doors, trim and rugs next to the samples.
Two or three samples is usually enough. More than five tends to make the decision harder, not easier. Choose a direction first (natural, mid-brown or dark), then sample within it.
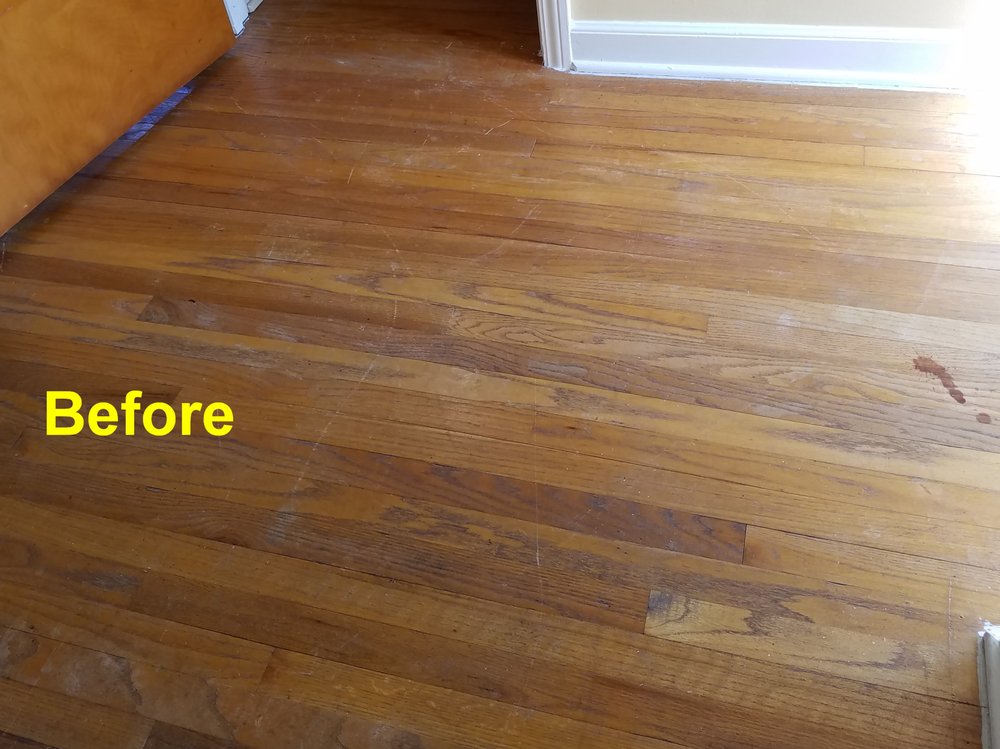
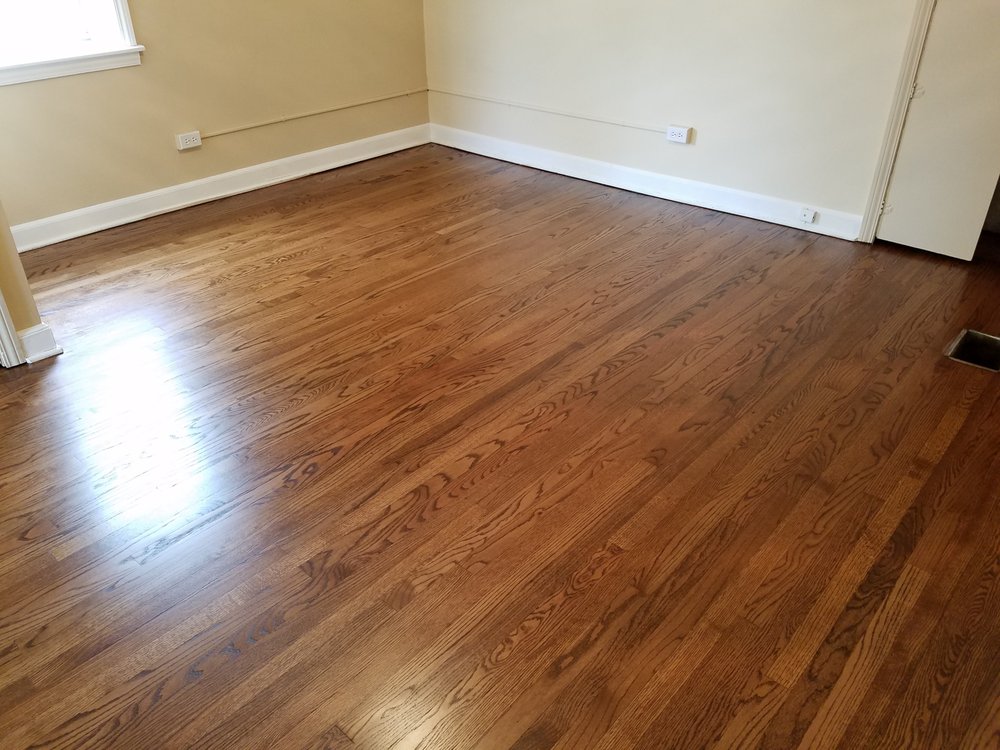
Before — an oak floor that had turned orange and dull under a worn, aged finish.After — sanded to bare wood and restained a warm mid-brown. The grain figure stays visible through the stain.
The finish changes the color too
The coats that go over the stain are not neutral, and choosing them is part of choosing the color.
Oil-based polyurethane adds an amber tone immediately and keeps warming with age and light. Over a mid-brown it adds richness. Over a gray or pale color it pulls toward yellow and can undo the look you chose.
Waterborne polyurethane stays close to clear, so the color on day one is close to the color in year ten. It is the realistic way to hold a pale, neutral or gray floor.
Sheen changes perception. Matte reads softer and slightly lighter; gloss reads deeper and shows everything. Most homeowners out here choose satin or matte.
Our finishes guide goes through each option, what it does to your week, and how each is repaired later. The one rule to take from it for stain color: decide the stain and the finish together, and sample them together.
Stairs, other rooms and prefinished floors
Stairs. Treads, risers, railings and the floor at the top and bottom of a staircase are seen together. If the floor changes color, the stairs normally need to follow, and treads that are a different species from the floor will take the same stain differently. Our stair guide covers matching stairs to a floor, including painted risers as a way to reduce the matching problem.
Other rooms. A color change in one room of a continuous floor creates a line somewhere. Plan where that line falls — ideally a doorway or threshold — or change the color on the whole connected floor.
Prefinished floors. Factory-finished boards carry their color in the factory coating. There is no restaining them without sanding through that finish, and on engineered boards that depends on how thick the wood layer is. Some thin-layer engineered floors cannot be sanded at all, and then the color you have is the color you keep.
Patches and repairs. A board replacement in a stained floor has to be stained to match the surrounding wood as it looks now, not as it looked on installation day. Our floor repair guide covers how repairs are blended.
Species and stain, side by side
Species
Base tone
How it takes stain
Gray?
Usually looks best
Red oak
Warm, pink to salmon
Evenly and predictably; open grain shows through
Leans purple unless blended
Natural, warm or neutral mid-browns Most common
White oak
Tan, olive, cooler
Evenly; colors read cooler than on red oak
Reads true
Natural, pale neutrals, grays, browns
Maple
Pale cream
Unevenly; blotchy, worse in dark colors
Sample carefully
Natural or very light tones
Hickory
Cream to dark brown in one board
Variation stays; can look blotchy
Uneven
Natural or light, for its character
General behaviour of each species. Every floor is sampled before a color is chosen — results vary with the boards, the sanding and the finish.
What a color change costs
Refinishing back to natural, or to the color the floor already has, is the baseline price. Using the western-suburb market figures in our refinishing cost guide, a stain color change typically adds about $1–$3 per square foot on top of a refinish. That is a general market range, not a quote and not our price list.
The extra cost is real work, not a markup:
More sanding. The old color has to come out completely, or it ghosts through the new one, especially where the old stain soaked into the grain.
Samples. Several colors tested on your boards before anything is committed.
Water popping, if used. An extra application and an extra drying period.
Stain drying time. Stain must dry fully before finish coats go on. The product label sets the minimum, and a cool or humid house stretches it.
More careful finishing. Stained floors show lap marks and missed spots that a natural floor forgives.
On the calendar, a color change usually adds at least a day to the refinishing schedule, and more if the floor is water-popped. Plan around the drying rather than hoping to beat it.
Two kinds of western-suburb floor
Across the towns we cover in DuPage, Will and Kane County — the full list is on our service area page — the color decision tends to follow the age of the house.
The older house with narrow oak strip. In Wheaton, Downers Grove, Geneva and the older parts of Naperville, many floors are narrow red oak strip that has been refinished before, sometimes more than once. The color question here is often tied to how much wood is left: a floor that has been sanded many times gives less room for a heavy color change or water popping. A natural or warm mid-brown usually suits these houses and their original trim.
The 1990s and 2000s subdivision floor. Across south Naperville, Plainfield, Aurora and Oswego, a lot of main floors are site-finished red oak that has ambered to orange under oil-based polyurethane. Owners usually want to get away from that color, and the two directions that work are a neutral mid-brown that calms the pink, or natural under a waterborne finish that keeps the wood pale. Gray is the request most likely to disappoint on these floors unless it is blended.
What we ask before a color change
Before recommending a color, we want to know:
What species the floor is, confirmed on a sanded patch, and whether the stairs match it.
How much wood is left, since that limits aggressive sanding and water popping.
What finish will go on top, because oil and waterborne change the color differently.
What stays in the room — cabinets, trim, railings, fireplace — that the floor has to live with.
Who uses the floor, including dogs, children and how much grit comes in through the back door.
How much light the rooms get, and from which direction.
Where the color change stops, if it is not the whole connected floor.
Whether you have a photo you love, and what species that floor was.
There is no single answer, but most floors in Naperville and the western suburbs are red oak, and the colors that consistently work on red oak are natural (no stain) and warm or neutral mid-browns. Those hold up well against dust and light scratches and suit most cabinets and trim. Dark stains and grays are chosen too, but they are more demanding: dark floors show dust and scratches, and gray on red oak needs blending to avoid a purple cast. Choose from samples on your own floor, not from a chart.
Yes, but a straight gray stain usually disappoints on red oak. The wood's pink undertone mixes with the thin gray pigment and shifts it toward lavender or mauve, especially in daylight. The common approach is to blend the gray with a neutral brown to cancel the pink, producing a gray-brown that reads as intended, and to settle the ratio with samples on the actual floor. If a true, clean gray matters to you, that look belongs on white oak.
You can go back to the natural color of the wood by sanding off the old stain and finish completely and using a waterborne finish that stays close to clear. You cannot make wood lighter than it is bare with a stain, because floor stains only add color. On red oak, the lightest realistic result is the pale natural oak under a clear waterborne finish. Getting lighter than that means bleaching, a specialist step with real risks, or choosing a lighter species such as white oak or maple for new flooring.
Because a stain color is a recipe, not a color. What you see on a finished floor is the wood's own tone, the stain, and the finish on top, together. The same stain looks different on red oak, white oak and maple; darker if the floor was water-popped; warmer under oil-based polyurethane; and different again in morning sun and evening lamplight. That is why samples should be done on your sanded floor, prepared the same way the whole floor will be, and seen under the finish.
It is possible but difficult. Maple is dense and close-grained, so it absorbs stain unevenly and tends to look blotchy, and the effect gets more obvious the darker the color. Careful preparation can improve the result, but a dark maple floor should always be sampled in a large area before committing. Most maple floors look their best natural or with a very light tone.
Using general market ranges for DuPage, Will and Kane County, changing the stain color typically adds about $1 to $3 per square foot to a refinish. The extra covers sanding deeper so the old color does not show through, testing samples on your floor, water popping if it is used, and the drying time the stain needs before finish coats go on. It usually adds at least a day to the schedule. These are market ranges, not a quote.